Here is the next photo-tutorial for the special stitches used In a Slipstream of Colour.
This is how to make W1, worked through the back of the loop, and how to handle the double-wrapped stitch on the following round.
First, we’re going to make the double-wrapped stitch through the back loop.
1. Insert needle through the back loop (tbl) of the next stitch. So, your yarn is at the back ready to knit, but you enter the stitch from the side you would usually use for purling. This twists the stitch on the left hand needle, when you work it.
2. Wrap the yarn around the needle once…
3. …and then a second time. I’ve deliberately spread the two wraps out so that you can see the yarn goes around twice. You don’t need to do this – make the wraps together in the usual spot where you wrap your yarn around your needle:
4. Pull both wraps of yarn through the old stitch in one go. Be careful not to drop one of the loops as you do this.
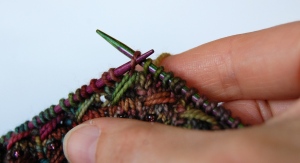
5. The new stitch on the right hand needle has two loops round the needle. The new stitch in front of my thumb is just one stitch, not two:
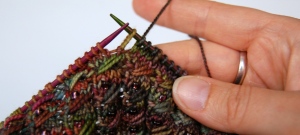
 6.I’ve spread the stitches along the needle a little so you can see the same stitch with two wraps in the photo below, after I’ve worked 3 more sts in rust. The double-wrapped stitch is yellow/lime, just above my thumb nail. If you need to check your work, you’ll find it easier to spread your stitches slightly so that you can see where the double-wrapped stitches are sitting. You’ll be able to see if you’ve missed any if the TV/conversation gets too distracting!
OK. That’s the stitch made. On the next round we are going to slip it, dropping off the extra loop.
7. Here, our yellow/lime double-wrapped stitch is next to work on the left hand needle. Make sure your yarn is at the back of your work.
8. Insert the right hand needle into the first loop of the stitch, as if to purl. You don’t need to worry about the rest of the loops – just get the right needle in that first loop.
9. As you start to slip the stitch from the left needle to the right, the second wrap will start to naturally unfurl from the left needle as you slip the stitch across. This is fine, even if it feels like something is going wrong!
10. You now have a long (elongated) stitch slipped onto your right hand needle.
11. After you have worked a few stitches, if your yarn is semi-solid or variegated you may see your elongated slipped stitch stand out in a different shade to the knitted stitches around it. Here, our yellow/lime stitch stands out against the navy blue.
12. When you reach this stitch in a later round, it can be slipped purlwise with yarn held at the back, as you would for any “normal” stitch. With the extra wrap undone, it can be treated like a regular stitch. Just handle it carefully because it will feel loose compared to the surrounding stitches. In subsequent rounds it can be worked just as any other stitch, according to the pattern instructions.
Happy knitting! If you still have questions for the Slipstream Mystery Knitalong Clue 3, please ask in the Ravelry Forum threads for the Cowl or Mitts projects.
What do you think? Doesn’t it make the colours flow? Got any questions I haven’t covered?


